While playing Metroid Prime or Metroid Prime 2: Echoes Multiworld Randomizer on Dolphin Emulator is the most popular method, you can also play it on a real Wii or Wii U Wii Mode (“vWii”) with a custom fork of Nintendont with support for networked multiworld and automatic item tracking.
Using a real Wii and Wii U console may be favorable if your computer does not run emulated GameCube games well.
Requirements
- A USB Storage Device or SD Card:
- Recommended device: From most to least preferred: USB Hard Drive, SD card, USB flash drive
- Recommended format: FAT32 with 32 KB clusters
⚠️ WARNING Formatting will erase all the data on that storage device. Backup/copy your storage device’s files to a different location before formatting.- NTFS will not work. exFAT can work, but may cause issues with other homebrew apps.
- A Wii or Wii U vWii with:
- The Homebrew Channel: Installation Guide
- A Network Connection:
- ℹ️ NOTE It is strongly recommended to use a wired Ethernet connection for the console instead of the console’s built-in Wi-Fi if possible. Using Wi-Fi may be more unstable.
Third-party adapters Ethernet using the ASIX AX88772 or AX88772A chipsets can work too, such as this one.
- ℹ️ NOTE It is strongly recommended to use a wired Ethernet connection for the console instead of the console’s built-in Wi-Fi if possible. Using Wi-Fi may be more unstable.
- A Supported Controller:
- For consoles with built-in GameCube controller ports, using those ports with a GameCube controller is recommended.
- For consoles without built-in GameCube controller ports, using a GameCube Controller Adapter with a GameCube controller is recommended:
Both the official Nintendo adapter and the Mayflash adapter (in Wii U/Switch mode) will work. - Otherwise, see the list of Nintendont-supported controllers
Steps
Insert the storage device into your computer.
Generate and export the game ISO/CISO image with Randovania.
Copy the exported game ISO/CISO image to the games folder of the root of your storage device.
(If the games folder is not present, create it.)
(For example, on Windows: X:\games\Prime Randomizer - MyMultiworldSession - Player.iso)
Insert the storage device into the console.
Start the Homebrew Channel
Press the HOME or START/PAUSE button to open the Menu in the Homebrew Channel.
Take note of the IP Address in the top-left corner. If it doesn’t appear, make sure your console’s Internet settings are configured correctly.
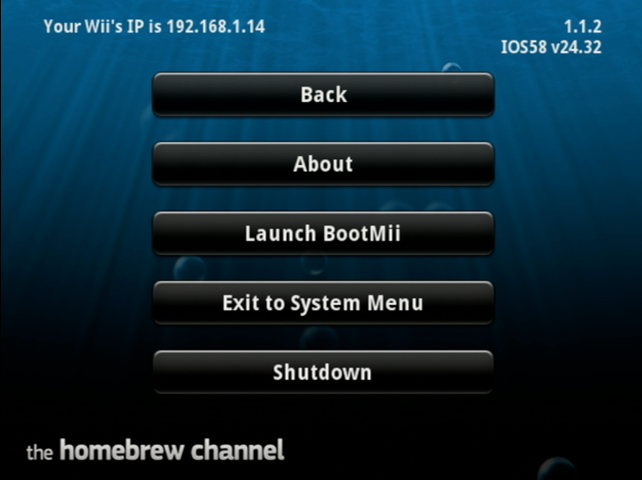
Console’s IP address shown in the Homebrew Channel Menu
Open the Games Connections menu in Randovania:
- If in the main Randovania window:
Open->Automatic Item Tracker->Connections
Opening the Auto Tracker from the main Randovania Window
Opening the Game Connections menu from the Auto Tracker window
- If in the Multiworld Session window:
Session and Connectivitytab ->Edit Game Connections
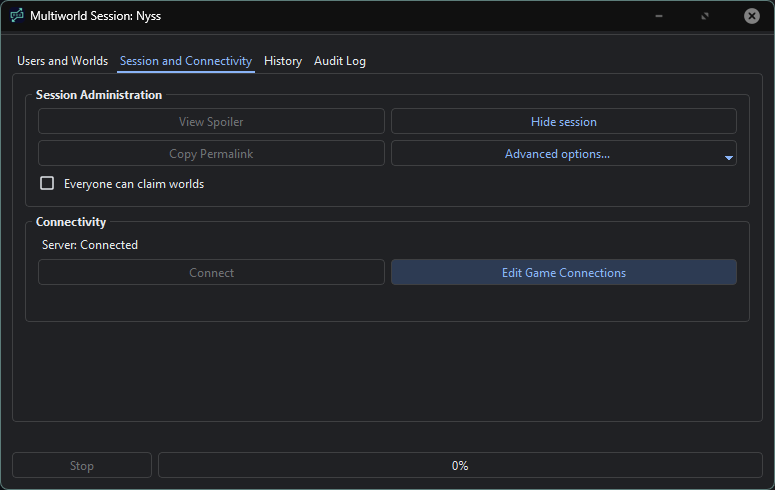
Opening the Game Connections menu from the Session and Connectivity tab
Click Add new connection and select Nintendont

Adding a Nintendont Connection
Enter the IP address noted from the console earlier.
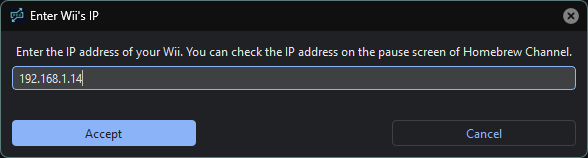
Entering the console’s IP address
Find the newly created Nintendont entry, then click the ⋯ button next to it to reveal a menu.
Then, click Upload Nintendont to Homebrew Channel.
This will upload the app the Homebrew Channel and launch it automatically.
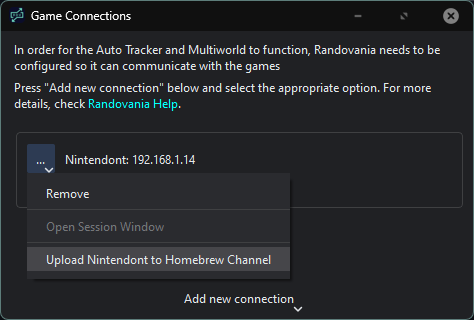
Uploading Nintendont Multiworld to the Homebrew Channel
In Nintendont, when prompted, choose the storage device that you are using.
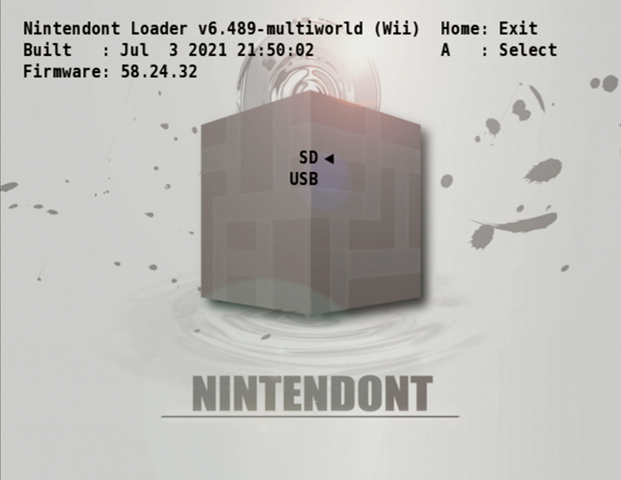
Device Selection screen in Nintendont
After, you will be presented with the game selection screen.
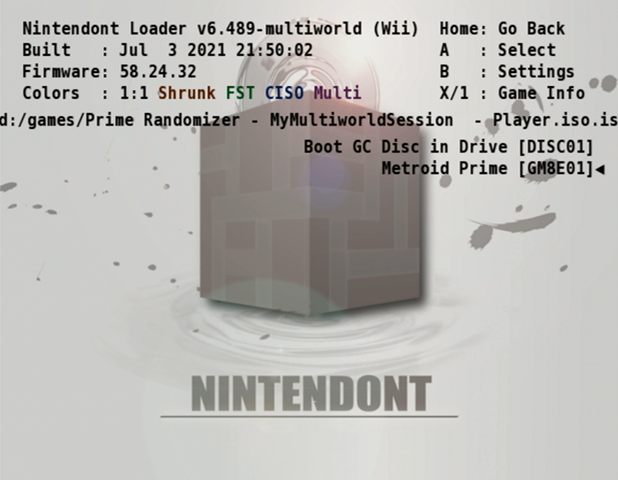
Game Selection screen in Nintendont
- If you do not want/cannot use a real GameCube Memory Card:
- While in the game selection screen, press B to enter Nintendont settings.
- Set
Memcard EmulationtoON. - Then press B again to return to the game list.
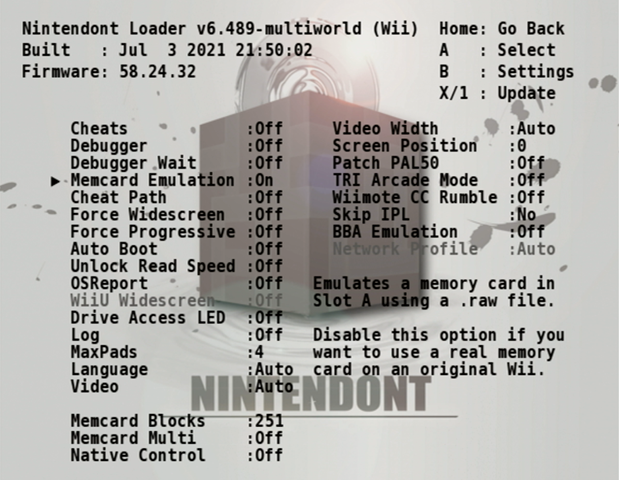
Nintendont Game Settings screen
- If you have a real GameCube Memory Card that you would like to use:
- Go to the next step.
Then select your game.
The game will start when a connection is made to Randovania.
Afer the game is booted, Randovania’s Connections menu should say “Connected”. You may now play your game!
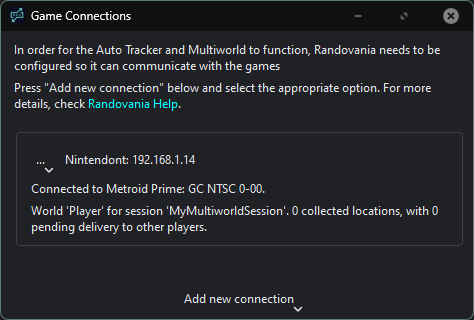
Randovania is connected to Nintendont!
Randovania Auto Tracker is connected to Nintendont!
If you are playing a multiworld game, it is prudent to regularly check the Randovania window to ensure that it’s connected.
Permanently Installing Nintendont Multiworld
These are optional steps that add a permanent Nintendont Multiworld entry to the Homebrew Channel without needing to upload it each time to play.
Insert the SD Card/USB Storage device into your computer
Download and extract Nintendont-v5-multiworld.zip from Releases · randovania/Nintendont
Copy the extracted Nintendont-v5-multiworld to your storage device’s apps folder.
For example, on Windows: X:\apps\Nintendont-v5-multiworld (the boot.dol should be present at X:\apps\Nintendont-v5-multiworld\boot.dol)
Insert the storage device into your console, launch the Homebrew Channel, and start Nintendont (Multiworld).
In the Homebrew Channel, you can switch between apps on your USB device and SD card by pressing 1 or X.
Troubleshooting
- After selecting the game in Nintendont Multiworld, the screen remains black and the game does not start.
- This may indicate that Randovania is failing to connnect to Nintendont Multiworld.
- Try repeating the steps until it works and checking your console’s Internet settings.
- If you are using Wi-Fi, try switching to a wired Ethernet connection.
- I’ve started Nintendont Multiworld but Randovania stills says “Disconnected”.
- The connection doesn’t begin until the game itself is started. Randovania should display “Connected” after the game has been started.
- I’m already in the playable game, but Randovania stills says “Disconnected”.
- Try repeating the steps until it works and checking your console’s Internet settings.
- If you are using Wi-Fi, try switching to a wired Ethernet connection.